Preparing and Shooting Events (v.2 - Jan. 2026)
- Kev W Wood

- Jan 26
- 6 min read
This post is a revision and update to the original (and still existing post) - 'Preparing, Shooting and Editing: Events'. In this post, I will focus not only on my preparation for shooting, and capturing of images (Part 1 of this post) - but my post-processing (editing) workflow as well (Part 2 - farther below).
In doing so, I will include the sharing of some of the photos from the 2025 Christmas Services of Riverwood Church Community (Winnipeg, Manitoba, Canada). There's a lot I could write here but I will only share a relative few photos for now:
Part 1: Preparation and Shooting
PREPARATION: Make sure you're prepared. For example: camera batteries charged (and more than 1 camera battery) and cards (SD, CF or other) formatted before you start shooting.
SHOT LIST: Consider a shot list. For instance, the leader for the specific church service, program or event may have specific shots in mind that they want. I would ask them if they do. They may say they're fine leaving that up to me. Either way, it's good to know what you want to capture before you start shooting. And some PiiiX Photographers may want to be given a shot list, and I am happy to provide that. However, even if you use a shot list, I encourage you to embrace the creative and spontaneous and try to be always be open shots that you see. For example, (coloured stage lighting shining on structure can be interesting to include in your composition or framing.
PREPARATION: Print out two (letter-sized) sheets with 'RESERVED' on them (in as big and bold letters that will fit on the page) and reserve two seats in the first row. At least for myself, one chair is for myself and the second is for my camera bag. It simply doesn't work to try to free up a chair by putting my (large) camera bag - with the different lenses - on the floor. It is a safety hazard (and - even worse - it's a black bag on the floor in a dark room) and it's then not possible to quickly change lenses to get a short. Arrive early enough to do this (before people are sitting in those seats). This likely includes reserving the seats before people are let into the room.
COURTESY & ACCOMMODATION: Be careful and mindful of not getting people in an image who don't want their photo taken. Do you have a right? In the community - yes. And, many venues these days have signs near the entrance informing people that photos or videos may be taken. It's important to be sensitive and accommodating - in the best interest of respect interaction Sometimes, it's good to ask a person if it is okay if you take their photo. While people usually don't mind, some are politely clear that they would prefer not, thank you. If you sense that a person is uncomfortable by you being a photographer - just keep moving along.

RESPECT: Don't use or share images of people in unflattering positions.
COMPOSITION: When composing your shot and people are involved, be mindful of where the edges of your frame is. For example, you want to avoid the bottom edge being just below, on or above a person's crotch or groin. Depending on the person's shape, try to stay near or above the person's belt/pant line or waist. For women, be mindful of where their bust is in relation to the bottom frame edge.
COMPOSITION: A well-composed image should be easily and quickly 'readable' - not too cluttered and so forth.
COMPOSITION: You can also incorporate the stage structure, and stage lights, into your image composition and framing.

And here is an example of lit stage structure being incorporated.

FOCAL POINT: Be intentional about what your camera is focusing on. And, be consistent in monitoring on what your camera is focusing. Adjust as needed. 'Back button focus' is a very useful tool. It's worth setting this up on your DSLR or mirrorless camera.

THE EYES: It is said, 'The eyes are the window to the soul'. Be mindful of a person's eyes. Overall, it's good to be able to see a person's eyes - with the pupil's visible (ideally). Ensure the eyes are in focus.

CANDID versus POSED: Sometimes I capture images in a natural environment (i.e. a volunteer as they are serving coffee or hors d'oeuvres) but sometimes I ask if I can take their picture (i.e. if they can pose for the camera - i.e. a volunteer look at the camera).


LIGHTING: Use any available natural light to your advantage. (And get it BEHIND YOU versus in front of you). For example, if it is still daytime - put the window behind you so that the natural light is shining on the subject.
LIGHTING: Know when you simply need a flash. But - beware - 1) Staff and worshippers really don't want flashes going off during a service or program; 2) Flashes can really change the look(/capturing) of an image - not always for the better. But, if one is needed - it is needed. Overall, try to not use a flash. If you do use a flash, for a church event, ensure that you obtain permission from relevant church staff or leadership before the event begins.
LIGHTING: It's a challenge. Lighting can vary in different areas of one stage in one venue. Be ready to monitor and adjust continuously.
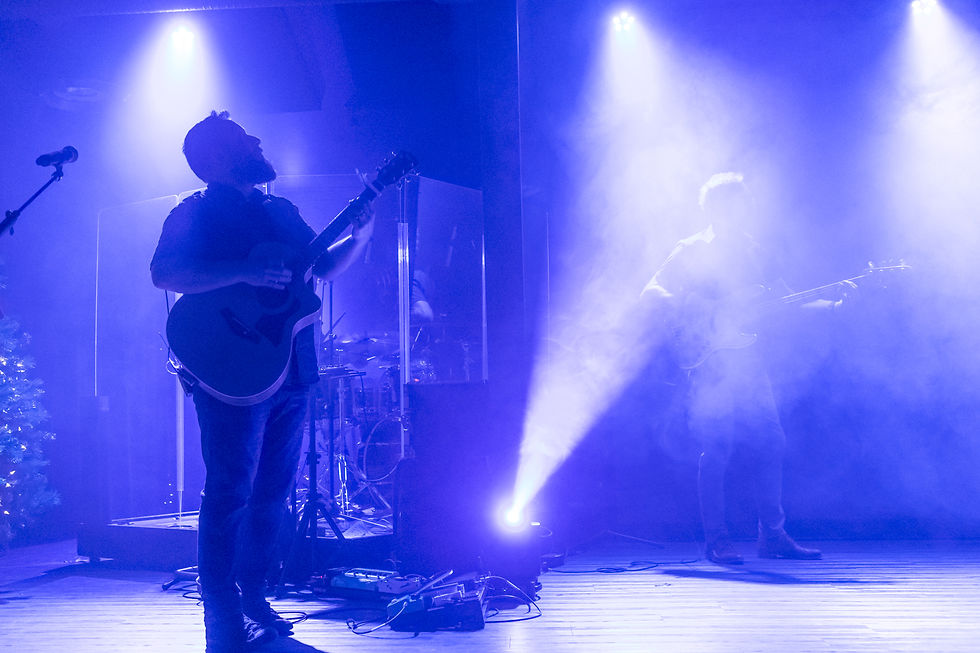
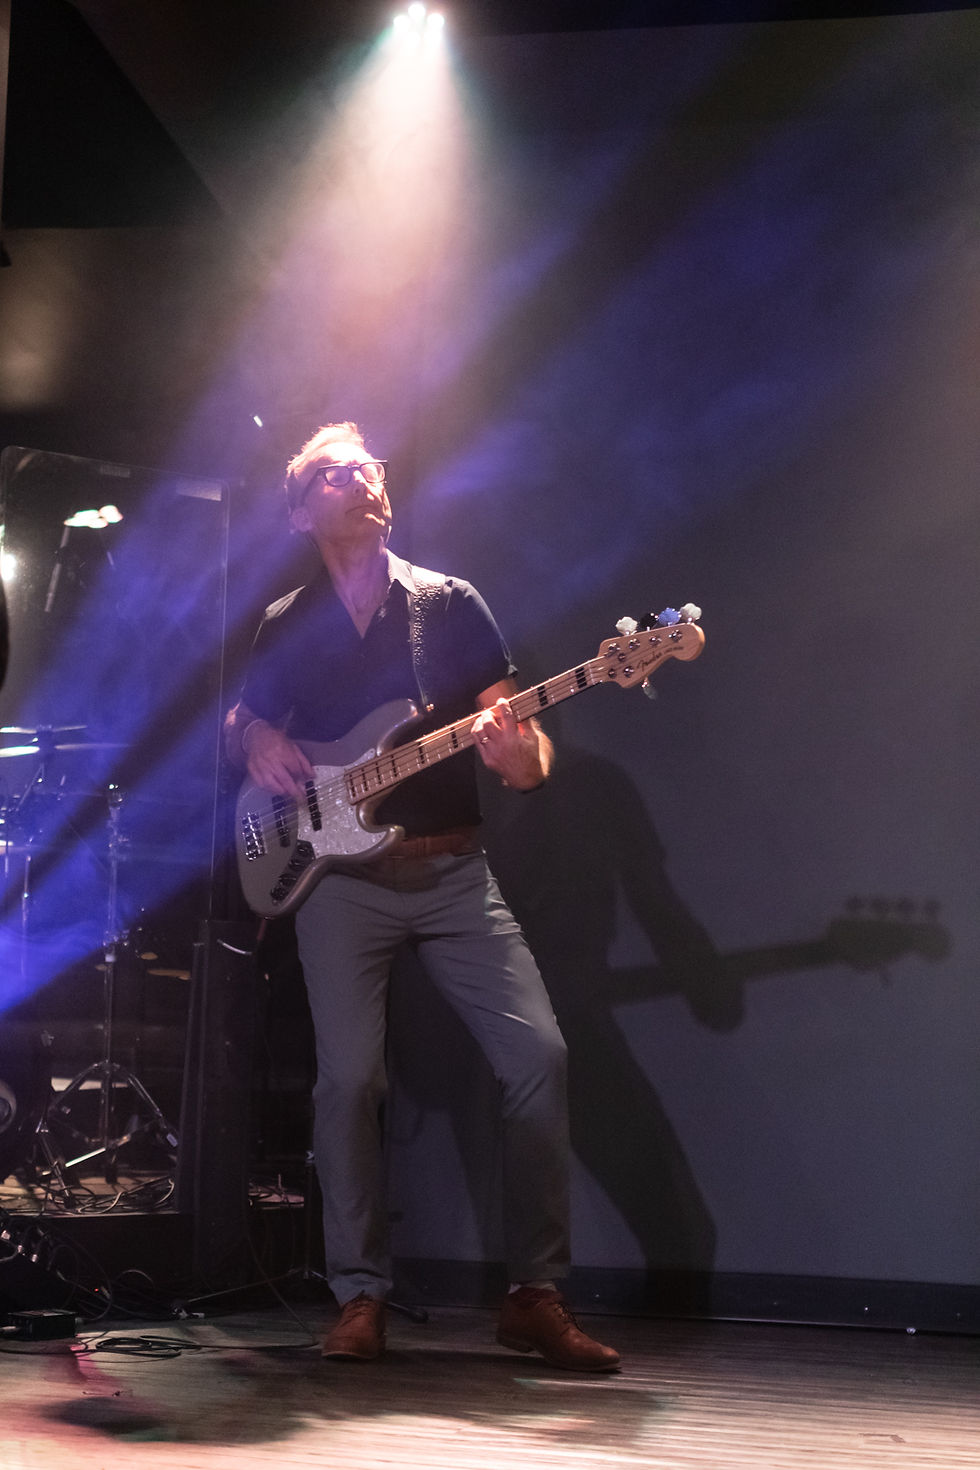
LIGHTING: Have fun! Get creative! For example, watch for silhouette shot possibilities during times of service element transitions/lighting transitions. A light shining behind a person can create interesting backlighting. Or a bright shining right at you leads to interesting possibilities. Regarding moving lights, observe their effects on the stage and people - and then try to capture images at key intervals during the lights' movement.
DEPTH OF FIELD (re: APERTURE): Set your aperture to get the depth of field that you want. However, in low lighting situations (i.e. a Christmas Eve services) you will likely not have a lot of choice. I usually need to shoot at f2.8 - using f2.8 lenses. If you have options to use different apertures - be intentional in selecting your aperture: f2.8, f4, f8, etc.
LEVELS: Sometimes it's nice to incorporate the back, upper stage lights into the image. To do this, I often 'slouch' or 'slide' down in my front row chair. This often accomplishes the (slightly lower) level that is needed. (Sitting on the floor MAY [?]be too low - but maybe not.) If you are in front of the audience, or amongst the people - don't stand up unless they are. If you do - to get a specific, important shot - do it expeditiously and then get out of the way again.

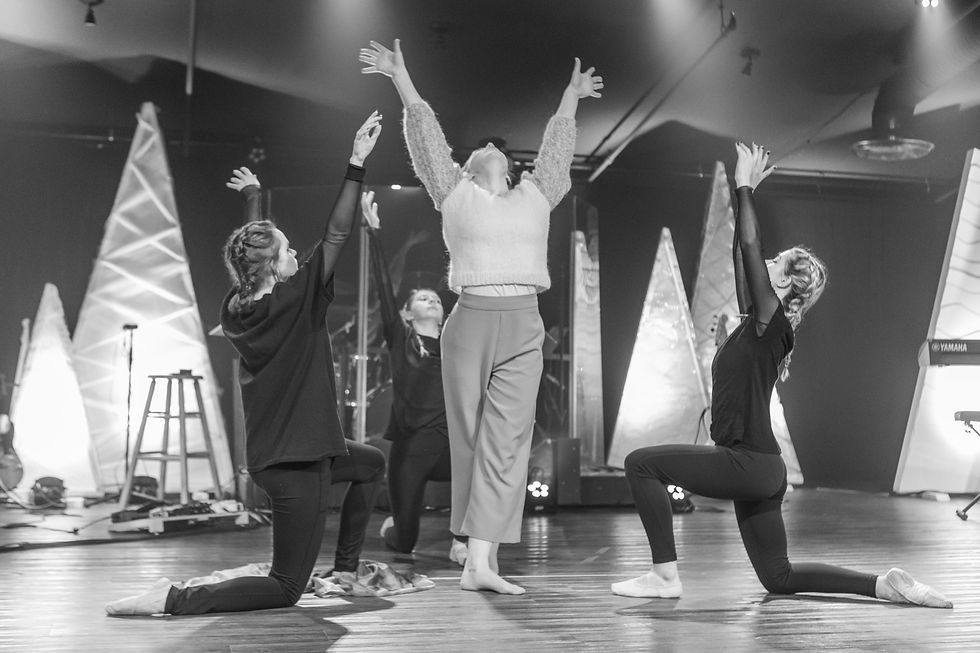
MUSIC: Be mindful of environmental considerations when shooting live music. This can include things that you may want to include into your image composition. For example, moving stage lights, stage fog, change of stage light colour, etc.. (The following five images are from Christmas 2021).


COMPOSITION and COLLISIONS. A good challenge (yes - it's a challenge!) is to TRY to see if there is an angle where you can get all the singers (or dancers) in the front row AND all the musicians in the back two thirds of the stage - so that they are each in view and nobody is standing behind somebody else (which is one example of a 'collision' - and which leads to an image that is not as easy to 'read'). Also try to watch for distracting collisions. For example, half of somebody's guitar cut off by the person standing in front of them or their music stand. In order to achieve this, I sometimes need to stand (even if the congregation is standing) in one spot - looking through my camera lens - for a period of time - waiting until I am able to capture an image where there are no collisions (or getting as close as possible to this goal as possible).


And, in this image, a singer's arm is in the frame but, in my opinion, the arm isn't a collision but actually adds to the 'instrument and vocal' aspect of the music.

FOCAL LENGTH: Be careful when using wide angle lenses. Unless you mean and want to, don't tilt them up or down - shoot straight ahead - level. The view and image will change dramatically!

BURST: There are times when it's good to use (low or high speed) burst (multiple frames per second). For dance, I almost always do. Depending on your preference, you could also use it when somebody is speaking. It's amazing how many images captured of a person speaking has their mouth/lips in a 'pucker' shape. Using burst can help to ensure that you are more likely to get at least one good (non-puckered) image. Or, just capture a lot of images at their moment. Either way, you want to capture multiple images (either manually or via burst) to ensure you get at least one good one.


Comments